Sunday, December 5, 2010

Astrophotography Gallery and Evolution

In my 11 months of astronomy adventures, I have collected quite a few astrophotos using my humble equipment. To sum them up, here are photos of my astrophotography for the past 11 months. Enjoy!

Here is my first try in astrophotography using a webcam and my 60 mm refractor. As seen on My First Astrophotography Experience
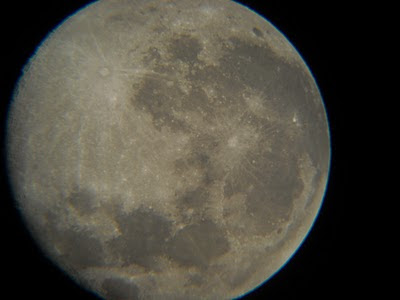
After learning the technique in using the webcam, I try to take photos of the moon again and produced sharper results that the previous one. As seen on Photos of the Moon
After a few trials, I decided to take pictures of the moon the third time around and produced even sharper results that the two previous attempts. As seen on A Tribute to the Moon
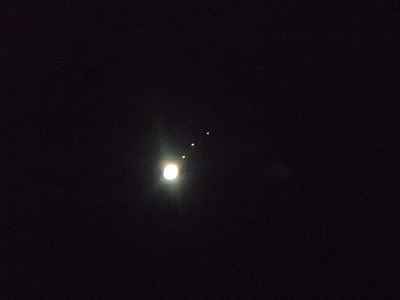
After graduating from Lunar Photography, I tried imaging the gas giant jupiter now using my 4.5 inch reflector and a Nikon Coolpix L16 point and shoot camera. As seen on Jupiter
With a new camera (courtesy of my friend), I tried lunar photography once again, producing ever sharper results. As seen on Lunar Photography 1
After mastering the methods and techniques, I can now produce good lunar photos such as this one using my humble equipment. As seen on
Lunar Photography 2

After trying planets and the moon, I now tried DSO astrphotography and got some very promising results using methods that I have learned and developed in my lunar and planetary imaging. As seen on
First Deep Sky Object Astrophotography
More photos will come as I acquire better tools and equipment so keep tuned to my astronomy adventures!

First Deep Sky Object Astrophotography

Doing astrophotography work is not an easy feat. There's the problem of setting up a decent telescope, getting a good camera and waiting for long hours to get magnificent shots of galaxies, star clusters, nebulae, planets and other heavenly bodies. However, doing astrophotography with a mediocre telescope and a digital point and shoot camera seems impossible especially if you are shooting Deep Sky Objects or DSOs (my definition of this is heavenly bodies found outside our solar system which is very, very far away).

However, I do not want to be limited with my equipment and I want to liberate whatever tools I have to achieve little things that will surely help me understand more sophisticated equipment. Tonight, I tried getting shots of the Orion Nebula using my trusty 4.5 inch equatorially mounted reflector, a 22mm Ramsden Eyepiece and a friend's Canon IXUS 130 digital point and shoot camera. Taking this photo only took me around 15 minutes including telescope setup. Here is the result of my effort of trying to capture the Orion Nebula (click the photo for a larger view): 

My astrophoto of the Orion Nebula

For reference, here is a more professional photo of the Orion Nebula taken using an 8 inch reflector and a Nikon D70 DSLR camera :

The Orion Nebula using mid-range to professional tools
such as big aperture telescopes and DSLR cameras.
(Photo credit : Ioannidis Panos; Pioannid at en.wikipedia)

Here are other photos that I took during the night (Please click photos to enlarge):

The constellation Orion 


A part of the Pleiades star cluster

My photo may be quite far from the reference photo but I'm on my way there. The use of simple tools will aid us all in exploring better systems and sophisticated equipment. As they say, a journey of a thousand miles begins with a single step. And I have started my journey taking small steps such as doing simple astrophotography with available tools. You can do it too!


Tuesday, October 26, 2010

Astronomers Anonymous of the Philippines


Astronomers Anonymous of the Philippines
Where amateurs meet amateurs
No pressure
No academic
Just for fun and for the love of cosmos

Officially founded on October 20, 2010, the Astronomers Anonymous of the Philippines (AAP) started from the ideas of criseltungala who took interest in astronomy very early and absindex who have been providing quality telescopes in the Philippines for enthusiasts like me and other people who have a profound love for the cosmos.

AAP aims to be a community of amateurs as well as non-amateurs that is anchored on sharing their knowledge on equipment, experiences and techniques to each other for the development and improvement of amateur observational astronomy in the Philippines. Moreover, the AAP aims to propagate and introduce amateur astronomy to the Filipino communities who have not been blessed with having their own telescopes or to those who have no prior experience when it comes to astronomy but has a deep desire and love for the cosmos.


You can visit us at Astronomer's Anonymous of the Philippines Blog or send us an email at anonymousastronomers@gmail.com

As of press time of this blog post (revised December 6, 2010 - 9:00 PM), the AAP is comprised of the following members:

Absindex (Planet Oz)
Marvin Xylon Montemayor (Cavite)
Crisel Tungala (Antipolo)
Maui Molina and kids (Bangued, Abra)

Jorge Echevers (Panama)

Juan Elmer Salido (Las Pinas)
Carlo Salido (Las Pinas)
Andy Chua (Pasig)
Dan Casino (Brazil)
Liezl Inocencio (Cavite)
Melvin Capilitan (Antipolo)
Charlie Feir (Baguio)
Tin Olano (Paranaque)
Pocholo Mendiola (Cavite)
Jayson Martinez (Bulacan)
Carlo Bernardo (Marikina City)
Jay Ryan Pabon (Antipolo/Zamboanga City) 
Jowen Ray Pabon (Antipolo/Zamboanga City)
Mark Arzadon (Pangasinan)
Gerry Gonzales
Elliot Sicat (Quezon City)
Henry Lapis (SM Tickets, SM Megamall)
Bernadette Pilares (SM Tickets, SM Megamall)
Girlie Ragsag (SM Tickets, SM Megamall)
Gigi Lamsen (SM Tickets, SM Megamall)
Maria Concepcion (Quezon City)
Marvin Morata (Cavite)
Jerri Michael Ambion (Cabanatuan)

You can also view criseltungala's blog here which served as the launching platform for the AAP. Further news about AAP shall be released soon. Please help us spread the word about AAP! You can link this blog post to your websites or facebook profiles or your own blog.

Thursday, October 14, 2010

Lunar Photography

Here is another set of lunar pictures. The night was rather clear and the moon was high up in the sky. I took the opportunity to capture some images. It was hard to get focus because I was constantly adjusting the camera, its tripod and the telescope at the same time. Every time I get a good lock on the focus, the moon have already drifted off the field of view so I had to multi task to get decent photos. I used the same method described in my previous post of Lunar Photography


Equipment : 60 mm equatorially mounted refractor with 22 and 9 mm huygenian eyepieces and a Nikon Coolpix L16 digital point and shoot camera.


These second set of photos were taken using my 4.5 inch newtonian with a 22 mm and 9 mm Huygenian eyepiece.


Friday, September 24, 2010

Lunar Photography

After quite some time of taking a break from the moon, I again return to this eerie object that pierces the serenity of the night sky. But this time its not just observing that I did. I also tried some astrophotography featuring the moon. As you can recall before, I had previous posts (Photos of the moon and A tribute to the Moon) of moon pictures using a webcam held directly over the eyepiece. Now with a new camera generously given by my friend Rafael del Rosario, I try taking pictures of our world's nearest neighbor. 

Here is the list of the equipment that I used during the observation and photography:

My 60 mm f/15 equatorially mounted refractor
22 mm Huygenian Eyepiece
Nikon Coolpix L16 Digital Point and Shoot Camera
Generic Camera Tripod from CD-R King
Patience and Determination

To give you an idea of what my setup is, here is a photo showing the equipment's arrangement : 


The setup is very straightforward - once I have set up the telescope, I just position the camera and adjust its tripod in a way that it will align with the eyepiece. After that, I check the LCD screen of the camera if the image of the moon can be seen clearly without vignetting or darkening at the corners like the ones I took before. When everything looks fine, I take the photos. I am sure that anyone with a digital camera, a telescope and a tripod for their camera can take astrophotos of the moon and planets.

After a few adjustments and trial shots, I came up with these shots of the moon.


And finally, a landscape picture with the moon (but in a portrait orientation) joined by Jupiter which is the bright star North East of the bright moon.


In my opinion, good astrophotography is possible with even the most basic equipment. Of course capturing photos of galaxies and star clusters are not possible with my setup due to the lack of a manual exposure but its not a loss to try what you can do with equipment available to you just like the way I did.

Sunday, September 12, 2010

Jupiter

Finally after a few months of cloudy skies and inactivity, I'm now back with new experiences in amateur astronomy. 

Since the season here in the Philippines showcases the planet Jupiter during the evening, I have been taking every opportunity to observe and attempt to photograph the giant gas planet. My most recent observation was at the evening until early dawn of September 10, 2010. A good dose of rain have been falling early that afternoon and when late evening crept in, the skies cleared up like all dirt and dust and smoke were removed by the rain. Visibility that night was very clear and observing conditions were one of the best in my experience.

Jupiter was very clear with its four Galilean moons during that night. One cloud band was prevalent and other soft details were visible at around 100x. Observing at low power was also a joy - the Gas Giant floating about like a brilliant gem in the darkness of space adorned with four gleaming pearls all lined up perfectly with the planet.

I also used the opportunity of good seeing to do some experimental astrophotography using a Nikon Coolpix L16 point and shoot digital camera and a generic camera tripod. Equipment used was a 4.5 inch f/7.8 reflector - equatorially mounted and manual tracking. Images were obtained using a rather weird eyepiece projection technique where I placed the camera's lens right in front of the eyepiece and then secure the tripod where the camera was mounted. The camera's lens were zoomed all the way to its longest telephoto setting in all photos.

Here are some of my photographs of Jupiter


Low Power View


Galilean moons and jupiter at low power


Like brilliant gems embedded in the sky


100x using 9 mm eyepiece


Trying to capture detail at 100x


100x using 9 mm eyepiece

Only three or two of the moons are visible in the photos because the last one is quite far from the other three and my camera has a very limited field of view. Most of the photos are also overexposed because of the camera's lack of sophisticated metering as well as inferior sensor compared to high end CCD equipment and DSLRs.

I also tried getting a video of Jupiter in a desperate attempt to capture some detail and avoid overexposure as well as trails caused by inadequate tracking or camera shake or both. The videos can be viewed below.


I also did a composite of the video and stacked the frames using Registax and came up with the following pictures


1st composite image


2nd composite image (Note two dim specks of light at the northeast part of jupiter, those are two of its moons.)


3rd composite image. If you'll view this full screen (which can be done by clicking on the photo), you can see two tiny specs of light which are moons of Jupiter.


An enlarged crop of the 1st composite image, saturation adjusted in Photoshop to show detail.

Thursday, June 24, 2010

Sketching on the eyepiece

Here are some sketches using the 4.5 inch reflector. The sketches feature the M6 and M7 open star clusters.

Here is a sketch of M6

Here is a sketch of M7